If you have ever tried to drape frost cloth over a raised bed at dusk while the wind turns it into a parachute, you already understand the magic of hoops. A simple set of flexible PVC hoops turns your bed into a modular “cover-ready” system. In spring it can help block cabbage moths, in summer it can hold shade cloth, and in fall it can stretch your season with greenhouse film.
What I love most is that you can build this in an afternoon with basic tools, and you do not have to commit to a permanent structure. The same hoops can support insect netting today and clear plastic tomorrow.
Choose your hoop style
There are two beginner-friendly ways to mount hoops to a raised bed. Both work. The best choice depends on how tall your bed is, how windy your yard gets, and whether you want to remove the hoops often.
Option A: Rebar sleeves (my go-to)
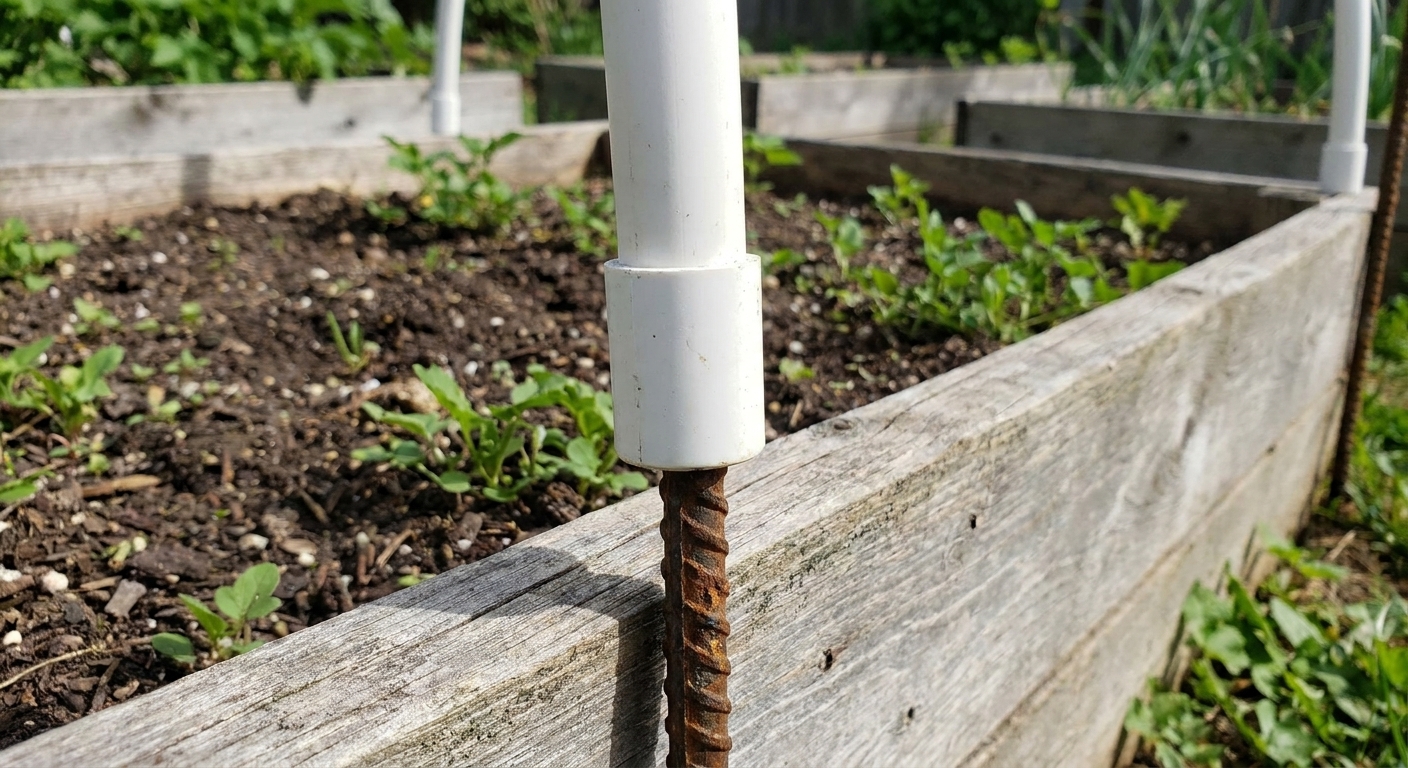
You pound short pieces of rebar into the ground near the bed, then slip PVC over the rebar like a sleeve. This is strong, cheap, and easy to repair.
- Best for: wind, frequent cover changes, taller hoops
- Downside: requires hammering rebar into soil (hard in rocky ground)
- Placement tip: I usually drive rebar just inside the bed wall so it does not snag feet or mower wheels. If you need every inch of planting width, you can drive it just outside the bed instead.
Option B: Side-mounted straps or conduit clamps
You screw pipe straps or conduit clamps to the outside of the bed and pop the PVC in and out. This looks tidy and works well for shorter hoops.
- Best for: beds on patios, very shallow soil, or places you cannot drive rebar
- Downside: bed boards take the stress, so use quality lumber, washers, and good screws
Materials and tools
For a typical 4 ft wide raised bed
- PVC pipe: 1/2 inch Schedule 40 for light-duty covers, or 3/4 inch Schedule 40 for sturdier hoops in wind or with plastic
- Rebar (Option A): 3/8 inch diameter, cut into 18 to 24 inch pieces (two per hoop)
- Or clamps (Option B): 1/2 inch or 3/4 inch conduit straps to match your PVC, plus exterior screws and washers
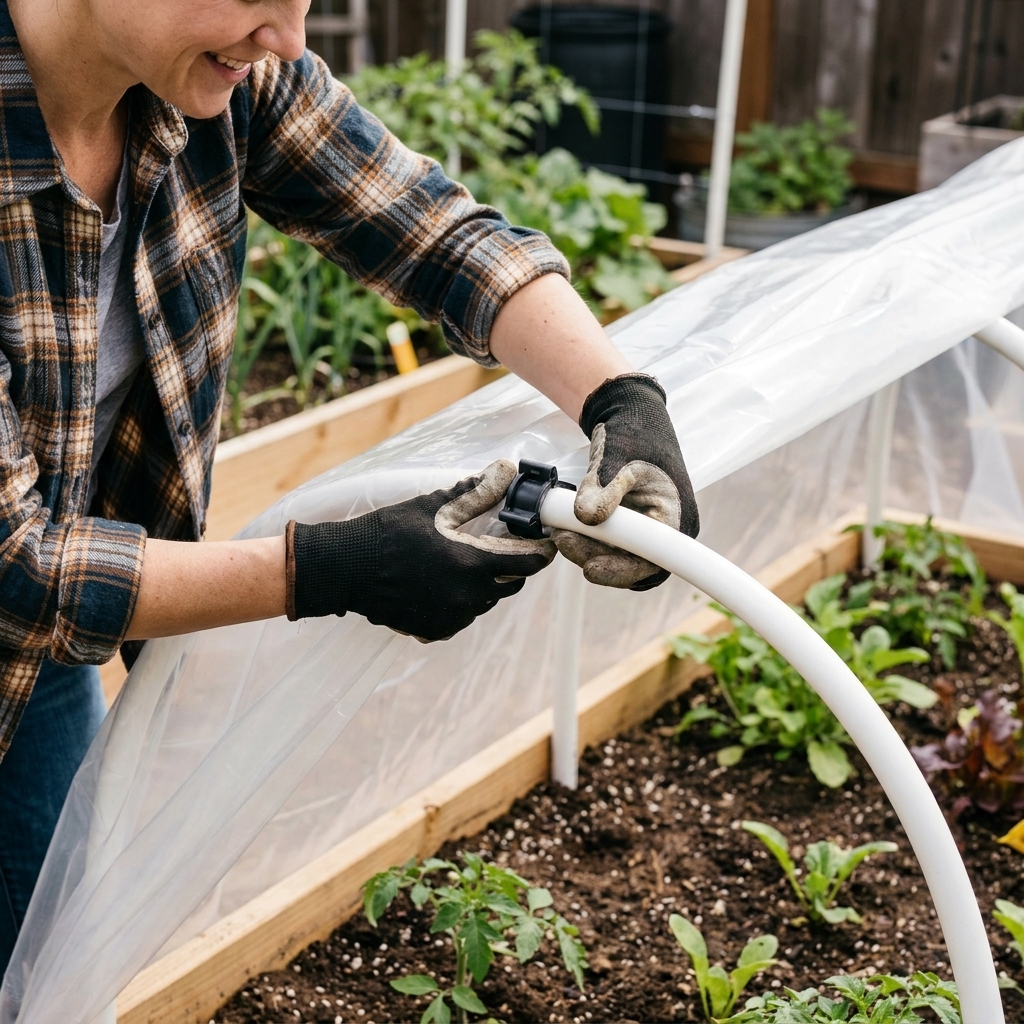
- Ridge support (recommended for plastic): 1/2 inch or 3/4 inch PVC for a ridge pole, plus zip ties or PVC tee fittings
- Cover material: insect netting, bird netting, shade cloth, frost cloth, or UV-treated greenhouse film (often sold as 6 mil and rated by years)
- Fastening the cover: spring clamps, snap clamps for PVC, binder clips, or battens (1x2 boards) to pin fabric along the bed edges
- Optional but very helpful: sandbags or water jugs for windy days, foam pipe insulation (to prevent plastic wear on the hoops)
Tools
- Measuring tape
- Marker
- Hacksaw or PVC cutter
- Drill and driver bit (for Option B)
- Rubber mallet or small sledge (for Option A)
- Safety glasses and gloves
Small detail that saves covers: After cutting PVC, knock down sharp edges with sandpaper, a utility knife, or a quick pass of a file. Those little burrs can start tears in netting and plastic.
How many hoops do you need?
Hoop spacing depends on what you are covering.
- Insect netting or shade cloth: every 3 to 4 feet is usually fine.
- Frost cloth: every 3 feet helps keep fabric from sagging onto plants during wet snow or freezing rain.
- Greenhouse film: every 2 to 3 feet is sturdier, especially in wind or snow.
For an 8 foot bed, I typically use 3 hoops for netting (one near each end and one in the middle), or 4 hoops (about every 2.5 feet) for plastic.
Measurements that work
For a classic 4 foot wide bed, you want an arch tall enough for plant growth and airflow, but not so tall that it becomes a sail.
PVC length per hoop
- Low tunnel (greens, seedlings): 8 to 9 feet of PVC per hoop
- Medium tunnel (brassicas, bush beans): 10 feet of PVC per hoop
- Taller tunnel: 12 feet of PVC per hoop, plus a ridge pole and very solid anchoring
If you are unsure, start with 10 feet. It is the sweet spot for most raised bed setups. Test-fit before cutting anything shorter so you do not accidentally trim too far.
Rebar height above ground (Option A)
I like 10 to 12 inches of rebar above the soil so the PVC has enough grip. That usually means pounding an 18 to 24 inch piece of rebar about halfway into the ground.
Note on fit: With 1/2 inch PVC over 3/8 inch rebar, the connection often feels a little loose at first. That is normal. Depth and straight rebar do most of the work. If you want a tighter sleeve, thicker rebar or smaller ID pipe can help, but it is not required for a reliable setup.
Install hoops with rebar
- Mark hoop locations. Measure along the long sides of the bed and mark matching points on both sides. Keep the first and last hoop about 6 to 12 inches from the bed ends.
- Pound in rebar. At each mark, drive a rebar piece into the soil so 10 to 12 inches remains above ground. Repeat on the opposite side so the pair is directly across.
- Cut and place the PVC. Cut your PVC lengths (start with 10 feet for a 4 foot bed). Slip one end over a rebar piece, bend the PVC into an arch, and slip the other end over the opposite rebar.
- Check height and symmetry. Step back. If one side looks higher, your rebar heights are uneven. Fix it now. Your covers will fit better later.
- Add a ridge pole (recommended for plastic). Run a length of PVC down the center over the top of the hoops. Attach it with zip ties at each hoop or use PVC tees if you want a cleaner, sturdier connection.
- Test with a tug. Gently shake a hoop. If it wobbles a lot, pound the rebar deeper or upgrade to thicker PVC.
Install hoops with clamps
- Mark hoop locations. As above, measure and mark matching points along both long sides of the bed.
- Mount the straps. Screw conduit straps to the outside of the bed boards at your marks. Use washers, and pre-drill to avoid splitting wood.
- Seat the PVC. Pop the PVC into the straps on one side, bend it across the bed, then pop it into the strap on the other side.
- Reinforce if needed. If your bed boards are thin, add a second strap a few inches below the first on each side to reduce twisting.
- Add ridge support. Zip tie a ridge pole to the top of each hoop, especially if you will use plastic.
My honest caution: If you have strong gusts, rebar sleeves usually hold up better than side clamps. Clamps can absolutely work, but wind loves leverage.
Attach covers securely
The cover is only as good as the way you secure it. Most “hoop house failures” are really “attachment failures.”
Fast ways to secure fabric to hoops
- PVC snap clamps: the cleanest, quickest option. Buy the clamp size that matches your pipe diameter.
- Spring clamps: cheap and strong, but they can pop off in extreme cold.
- Clothespins or binder clips: fine for insect netting in calm weather, not my pick for plastic.
Best way to seal edges
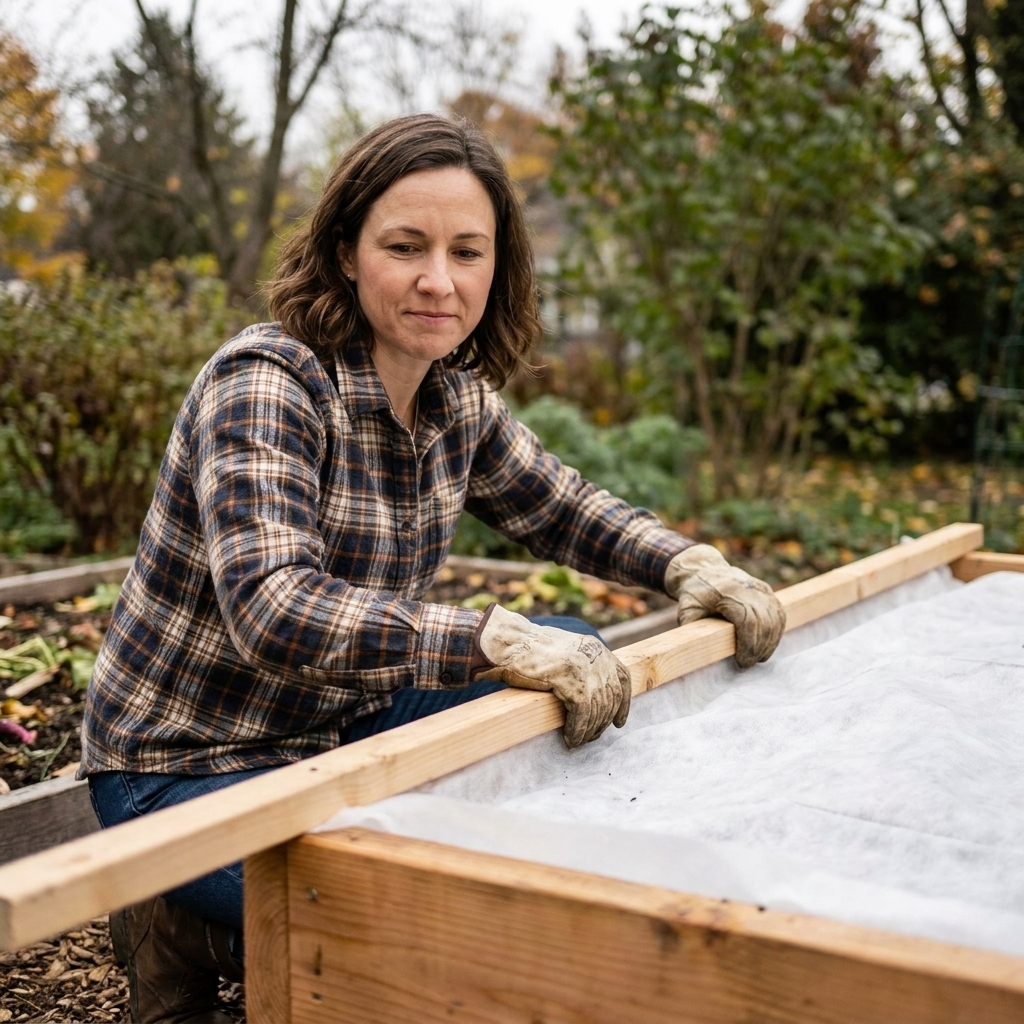
- Battens (1x2 boards): lay fabric over the bed edge and pin it down with a board. Heavy, tidy, and wind-resistant.
- Weights: bricks, sandbags, or water jugs. Great for temporary frost protection overnight.
- Staples: only for dedicated plastic installs where you do not mind making holes in the bed frame, and only if you use battens over the staple line to prevent tearing.
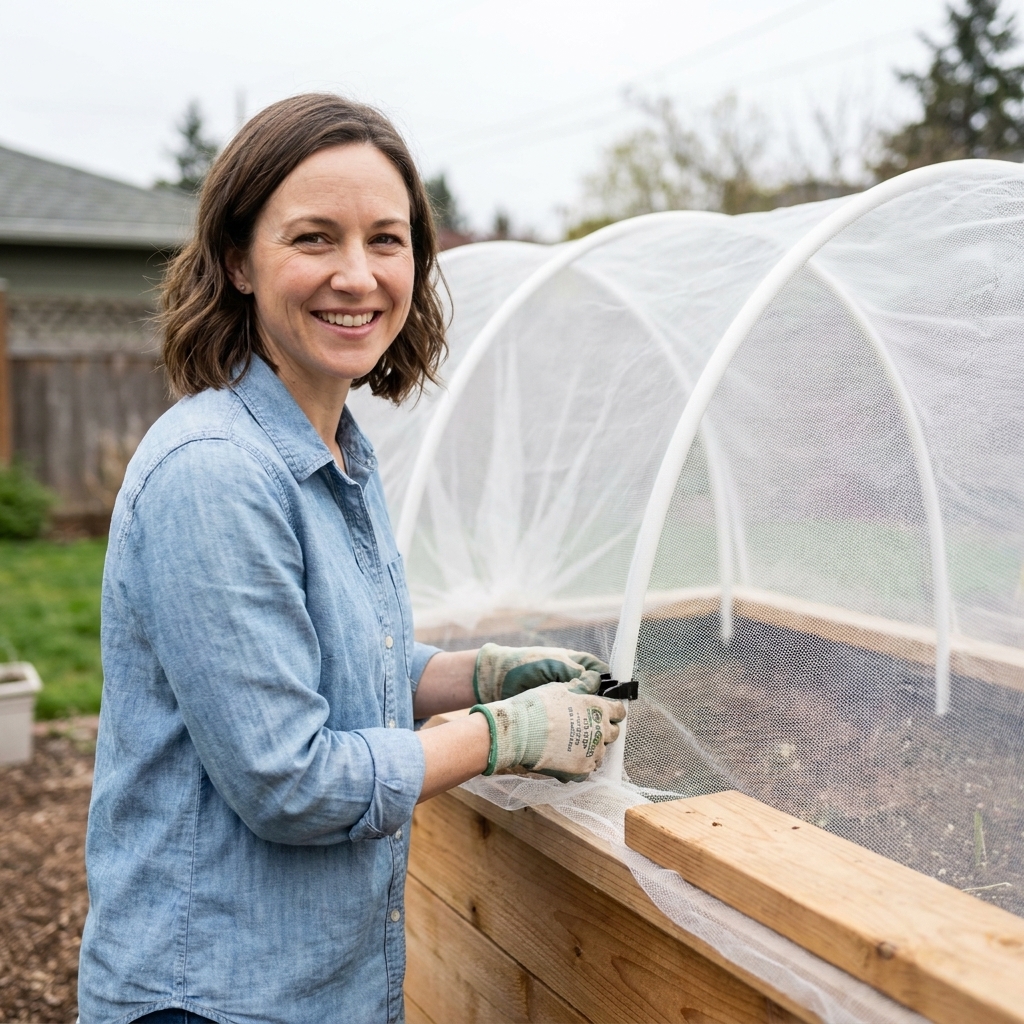
If you are using insect netting, remember the goal is a full seal. Even a small gap can turn into an all-you-can-eat buffet for cabbage worms.
Swap covers by season
Insect netting (spring to early fall)
Use fine mesh netting to help block cabbage moths, squash vine borers, and leaf miners while still letting rain through. Netting quality varies a lot, so check the mesh size before you buy. As a general target, many gardeners aim for something in the ballpark of 20 to 30 mesh (roughly 0.8 mm openings) for small flying pests. I keep one edge pinned with a batten and clip the other edge so I can lift it like a lid for harvesting.
Two pest-proofing habits that matter: Put netting on before pests show up, and check plants first so you do not accidentally trap aphids or cabbage worms inside your nice protected buffet.
Bird netting (seedlings and berries)
Bird netting works well over hoops because it stays off tender greens. Choose a mesh that will not tangle wildlife, and keep it pulled tight.
Shade cloth (hot spells)
30 to 40 percent shade cloth is a lifesaver for lettuce, spinach, and cilantro that want to bolt the second you blink. It also reduces evaporation in raised beds, which is a nice bonus.
Frost cloth (light frosts)
For surprise cold nights, frost cloth over hoops can often buy you a few degrees of protection. The exact number depends on the cloth weight, wind, and how well you seal the edges. The hoops also keep cloth from draping directly on leaves, which reduces contact, abrasion, and the chance of cold injury when fabric gets wet and heavy.
Greenhouse film (late fall to winter)
Clear plastic turns a hoop setup into a mini high tunnel. Venting is not optional. On a sunny winter day, temperatures can climb fast even when it is cold outside. I vent by propping up one side with a board or clipping the plastic higher for a few hours.
Cold, wind, and snow
If your winters are mild, basic hoops are enough. If you deal with wind, heavy rain, or occasional snow, beef up the structure so you are not chasing plastic across the yard.
- Upgrade pipe size: 3/4 inch PVC is noticeably stiffer than 1/2 inch.
- Add a ridge pole: this keeps hoops from leaning and helps prevent sag between arches.
- Add purlins (optional): run PVC along both sides at about mid-height, zip-tied to each hoop. This adds a lot of rigidity.
- Reduce hoop spacing: closer hoops handle loads better.
- Prevent abrasion: add foam pipe insulation or wrap the hoop tops with old hose where plastic rubs.
- Anchor the ends: gather and secure plastic at the ends with clamps and weights, or tie it down to ground stakes.
UV reality check: PVC will slowly get brittle in sun over time. If you want it to last, store hoops out of direct sunlight when you are not using them, or at least pull them for the off-season.
My go-to hoop kit
If you want a simple configuration that covers most needs without overthinking it, this is what I would build for a standard 4x8 raised bed:
- 4 hoops made from 10-foot lengths of 3/4 inch PVC
- 8 rebar stakes, 24 inches long, driven so 12 inches remains above ground
- 1 ridge pole (10-foot PVC) zip-tied at each hoop
- Snap clamps to match your PVC
- Two 1x2 battens cut to bed length for sealing edges
With that base, you can rotate netting, frost cloth, or plastic as needed without rebuilding anything.
Troubleshooting
My PVC keeps popping off the rebar
Usually the rebar is too short above ground, not deep enough in the soil, or the hoop is under extra tension because the ends are not lined up. Aim for 10 to 12 inches of rebar inside the pipe. If it is still loose, you can add a single exterior screw through the PVC into the rebar at each end, but only do this if you do not plan to remove hoops often.
The cover sags onto my plants
Add another hoop between spans, tighten the fabric with more clamps, or add a ridge pole so the top stays lifted.
My plastic is flapping loudly in the wind
Flapping leads to tearing. Tighten the plastic, use more clamps, and seal the edges with battens. If you can, vent from an end rather than leaving a loose side.
It gets too hot under plastic
Vent early and vent often. Even in cool weather, sun can overheat seedlings. I usually crack one side open anytime it is sunny and above about 45°F to 50°F (7°C to 10°C), but sun intensity and wind matter a lot. If you like gadgets, a cheap max-min thermometer inside the tunnel makes this feel much less like guesswork.
Netting lets pests in anyway
Check the bottom edges first. Most pest break-ins happen where netting is not sealed to the bed frame. Battens beat clips for a true seal. Also make sure you are using small enough mesh, and install it early so you are not sealing pests inside.
Safety notes
- Wear eye protection when cutting PVC and pounding rebar.
- Cap rebar ends if they are exposed where people walk. Tennis balls work in a pinch.
- Do not seal plastic tight on warm days without a vent plan. Heat buildup can cook plants fast.
FAQ
Is Schedule 40 PVC safe for the garden?
PVC is commonly used for garden hoops because it is cheap, light, and easy to work with. If you prefer to avoid PVC, EMT conduit or fiberglass rods also make excellent hoops, they just cost more and usually take more tools.
Can I bend PVC without heat?
For hoop arches, yes. You are flexing it, not permanently reshaping it. Just choose a length that makes a smooth curve without kinking.
How tall should raised bed hoops be?
For most raised bed crops, 18 to 30 inches above the bed surface is plenty. Taller is not always better. Taller means more wind load and more air volume to heat.
Will this protect from a hard freeze?
Hoops plus frost cloth help for light freezes. For hard freezes, you need layers (frost cloth under plastic) and you still may need extra heat retention like water jugs inside the tunnel. The big win is that hoops make layering easy.
How long will greenhouse film last on hoops?
UV-treated greenhouse film can last several seasons, but only if it is tight and not rubbing on sharp points. Flapping and abrasion are what shorten its life.
The payoff
Once you have hoops, you start gardening differently. You sow earlier because you can cover tender seedlings. You lose fewer brassicas to moths because you can actually seal netting. You keep greens alive longer because a quick plastic swap turns a cold bed into a protected pocket of growth.
And if you build it once and store the covers neatly, it becomes one of those satisfying garden systems that just keeps working year after year.