Root crops are the kind of harvest that makes you feel rich. One minute your raised bed looks like a scruffy patch of dying tops, and the next you are pulling dinner out of the soil. The catch is that potatoes, onions, and garlic store well only if you harvest at the right time and handle them like the living, bruisable things they are.
(Yes, onions and garlic are bulbs, not roots. But they are all underground storage crops, and they all punish rough handling.)
I learned this the hard way when I washed a gorgeous garlic harvest like it was a bunch of carrots. It looked spotless for about an hour, then started going soft and sad. Since then, my rule is simple: dig gently, keep skins intact, and cure before you store. Let’s walk through the process, raised-bed style.
Before You Dig
Tools that protect your crop
- Garden fork (my favorite for potatoes): it loosens soil without slicing tubers as easily as a spade.
- Hand fork or hori-hori: handy for tight spots in small beds.
- Pruners: for clipping onion and garlic tops later, not for yanking bulbs out.
- Harvest crate or shallow bin: something breathable. Avoid deep buckets where weight can bruise the bottom layer.
- Old towel or cardboard: for shading harvested bulbs and tubers right in the garden.
Pick the right day
For storage crops, dry weather is your best friend. Aim for a stretch of at least a day or two without rain so the soil is not muddy or smeared, and the skins can start drying quickly after harvest.
Ease up on watering
If you can, reduce watering about 1 to 2 weeks before harvest for onions and garlic, and 1 to 2 weeks before you plan to dig maincrop potatoes. In raised beds, soil drains faster, so this one step makes a big difference in how cleanly things lift and how well they cure.
One caveat: if your bed runs hot and dry, do not stress bulbs into early shutdown. I aim for “not soggy,” not “cracked and dust-dry.”
Harvesting Potatoes
When potatoes are ready
You can harvest potatoes at two stages:
- New potatoes: anytime plants are vigorous and you can feel a few good-sized tubers forming. Some varieties flower around the time new potatoes are ready, but not all potatoes flower reliably, so I use flowering as a hint, not a rule. Size is the real test.
- Maincrop storage potatoes: when vines yellow and die back naturally (or after you cut them back and let skins set). For best storage, you want thickened skins that do not rub off easily.
Here is my raised-bed cue: once the tops are mostly collapsed and truly dying back, I wait 10 to 14 days before digging. This helps skins set so they do not rub off in your hands. If a hard frost is coming, I dig sooner. Frozen potatoes do not store.
Step-by-step: gentle digging
- Cut back the vines if they are still messy and you want a cleaner dig. Leave stubs so you can find the row.
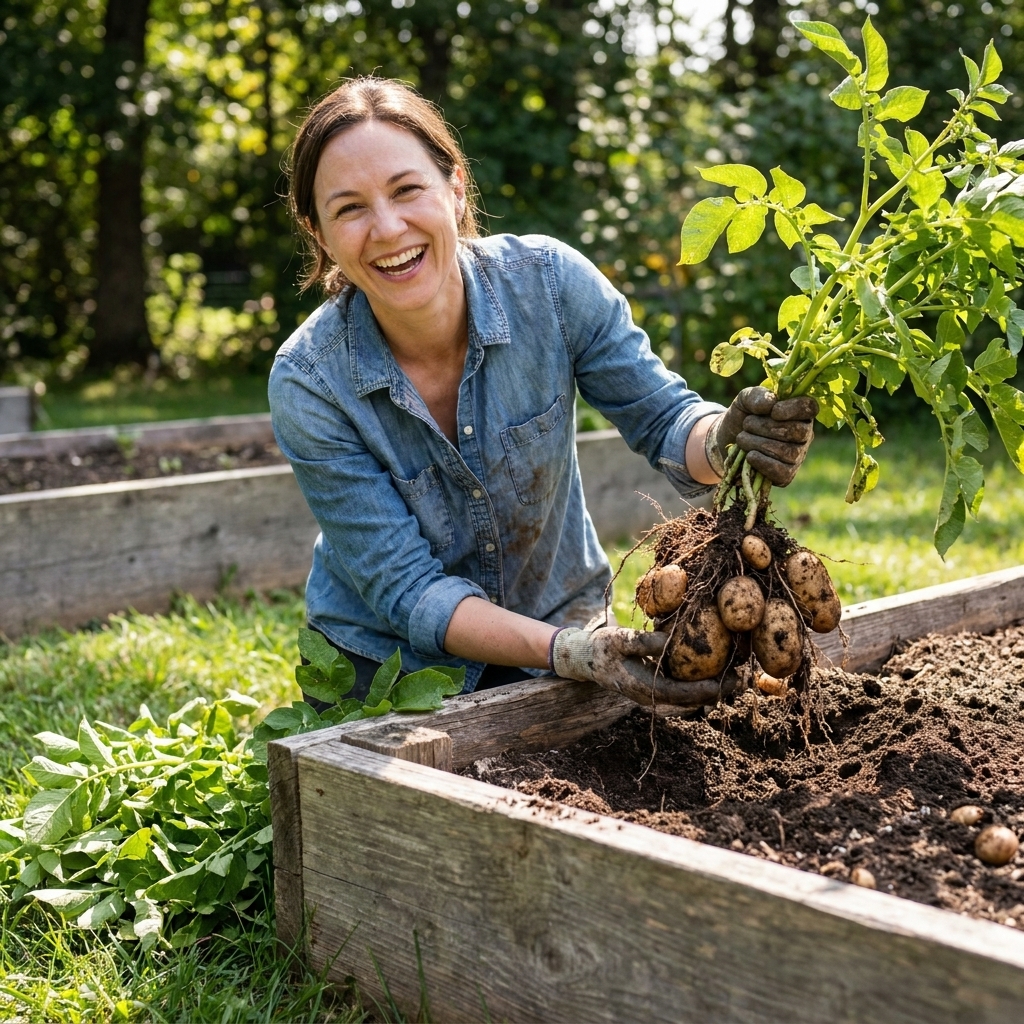
- Start wider than you think. Insert your fork 8 to 12 inches away from the plant stem, then lever up. In raised beds, potatoes often form closer to the surface and spread sideways.
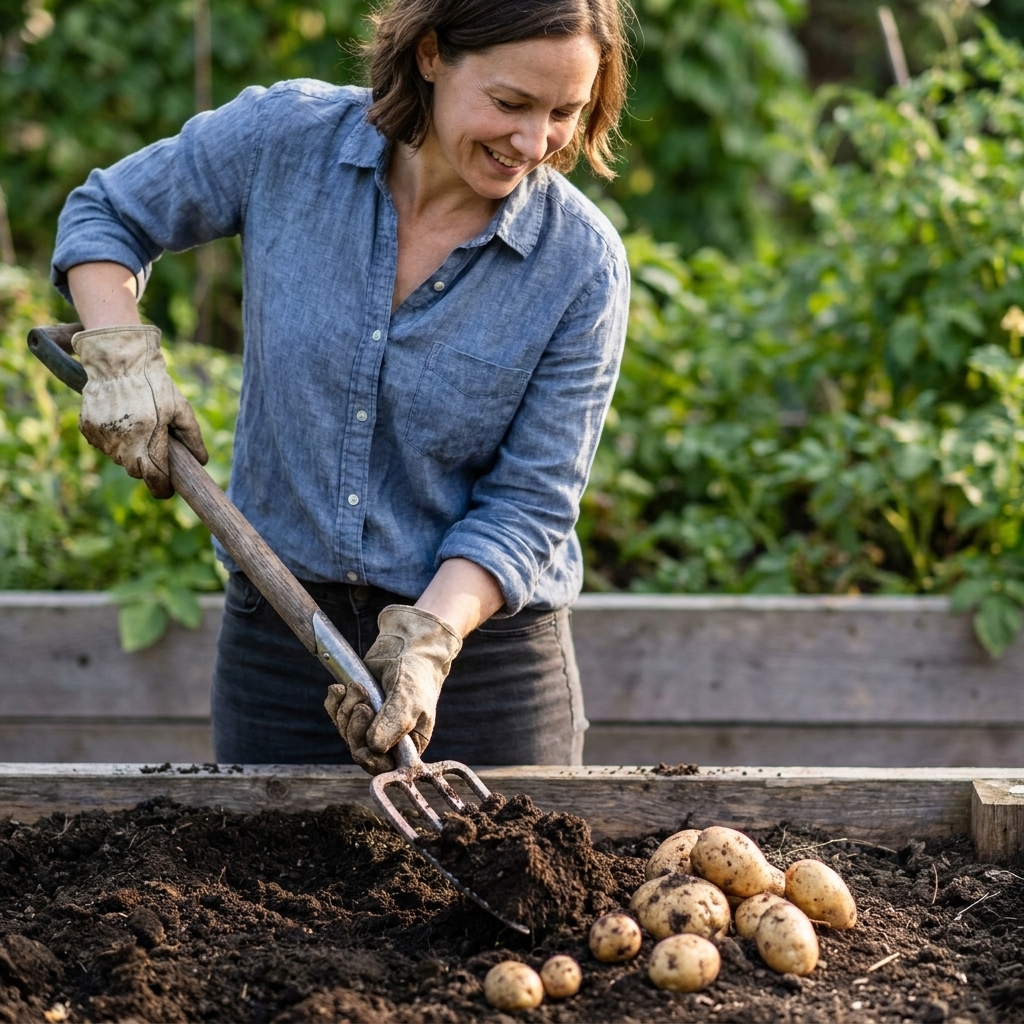
- Lift, do not stab. Work the fork under the hill and lift the soil like you are fluffing a cake.
- Gather by hand. Feel through the loosened soil and pick out tubers. I like to sift with my fingers because it finds the sneaky little ones.
- Keep them shaded. Sunlight can turn exposed potatoes green fast. Lay them on a towel or cardboard in the shade as you work.
Cleaning Potatoes
If you want potatoes to last, do not wash them at harvest. Water pushes moisture into tiny wounds and invites rot.
What to do instead
- Brush off big clumps of soil with gloved hands once the soil is dry.
- Let surface moisture dry first. If you dig in slightly damp soil, spread tubers out in the shade with airflow for a few hours before you do anything else.
- Leave a light dusting of dirt for now. It can flake off later.
- Sort immediately: set aside any sliced, punctured, or heavily scabbed potatoes to eat first.
My “eat first” pile
Any potato with a fork nick, soft spot, or cracked skin goes straight to the kitchen. One bad tuber can spoil neighbors in storage.
Curing Potatoes
Curing is basically a healing period. The potato forms a tougher skin and seals minor scrapes.
Only cure sound, dry tubers. If potatoes are muddy, let them dry on the surface first (out of sun), then cure. And never seal curing potatoes in plastic. They need darkness and airflow.
How to cure potatoes
- Temperature: 50 to 60°F (10 to 16°C)
- Humidity: high, roughly 85 to 95%
- Light: dark
- Time: 10 to 14 days
In real life, I cure potatoes in ventilated crates in a dim basement corner, covered loosely with paper to block light while still allowing airflow.
After curing: long-term storage
- Temperature: 38 to 45°F (3 to 7°C) is ideal
- Keep them dark to prevent greening
- Ventilation matters: mesh bags, slatted crates, or cardboard boxes with holes work well
- Keep them separate from onions: they prefer different humidity and airflow. Separation helps reduce spoilage and premature sprouting.
If you cook a lot of fries or chips, know this: very cold storage (especially below about 40°F) can make potatoes convert starches to sugars, which can taste sweet and brown faster when fried. If that matters to you, aim toward the warmer end of the range.
Harvesting Onions
When onions are ready
For bulb onions, the most reliable sign is the tops. Harvest when:
- About half to three quarters of the tops have flopped over naturally, and
- Bulbs look full and you can feel the neck softening.
Do not force all the tops down early. Let the plant finish its job. In raised beds with rich soil, onions can keep pushing leafy growth longer, so patience pays off.
Step-by-step: lifting onions
- Loosen the soil beside the bulb with a hand fork or garden fork.
- Lift from the base rather than yanking hard on the greens. Torn tops can open the neck and shorten storage life.
- Shake off loose soil. Do not bang bulbs together. Bruises show up later as soft rot.
- Keep them dry. If the ground is damp, set bulbs on cardboard under cover right away.
Curing Onions
Onions store well when the outer skins are papery and the neck is fully dry and tight. A thick, juicy neck is a rot invitation.
How to cure onions
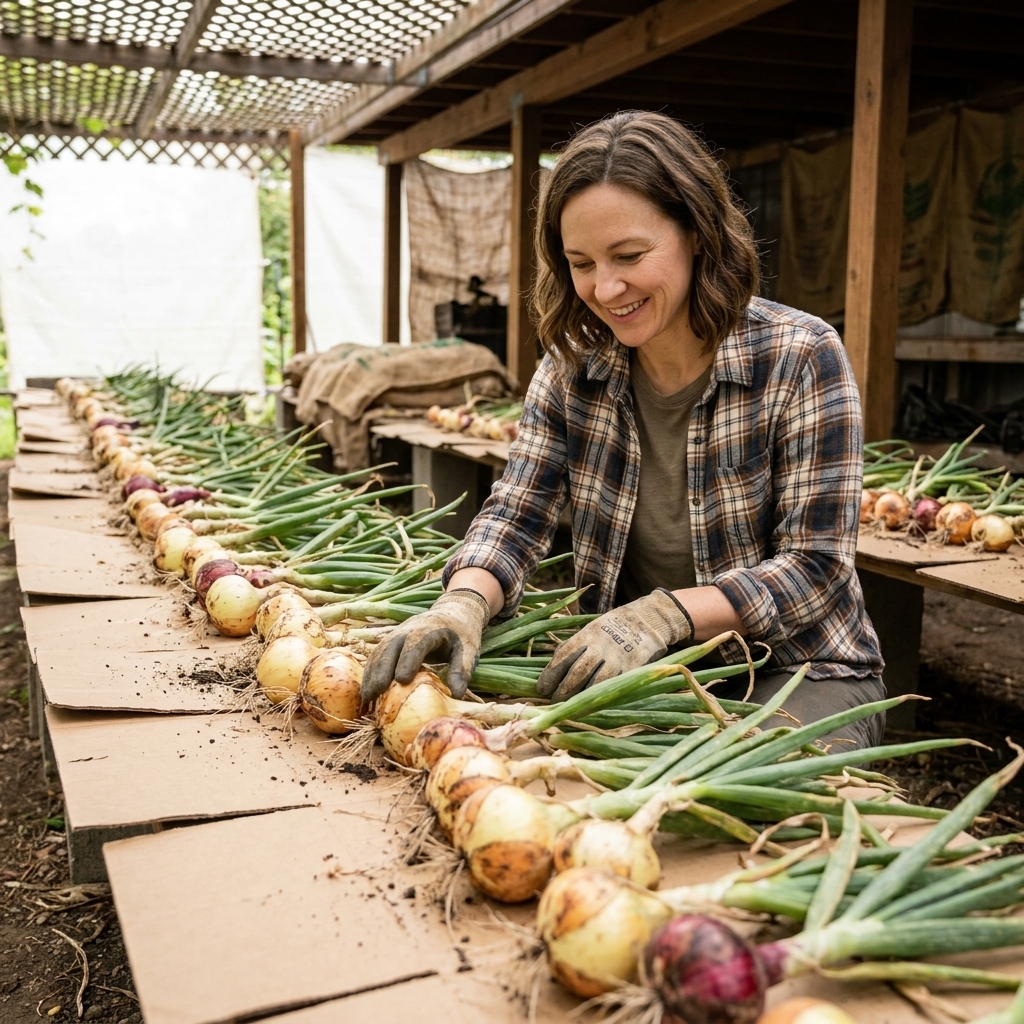
- Where: warm, airy, out of direct sun. A covered porch, open garage, or shed with a fan is perfect.
- How: spread in a single layer on screens, racks, or cardboard. Or hang in small bundles if airflow is good.
- Time: about 2 to 3 weeks, depending on humidity.
How to tell they are done
- Tops are completely brown and dry.
- Necks are tight and do not feel cool or damp.
- Skins rustle like paper when you handle them.
Trimming and storing onions
Once cured:
- Clip roots close to the base.
- Trim tops to about 1 inch above the bulb, unless you are braiding.
- Store at cool temperatures with airflow. Mesh bags or slatted crates work well.
Skip the fridge for whole cured onions. Refrigerators are too humid and can soften bulbs. (Cut onions are a different story. Those belong in the fridge.)
Harvesting Garlic
Garlic is the most “do not mess this up” crop in my raised beds. It is also the easiest to store if you cure it properly.
When garlic is ready
Harvest timing depends on leaf dieback. A good rule is to dig when:
- The lower 3 to 5 leaves are brown and dry, and
- The upper leaves are still mostly green.
Those remaining green leaves are important because each leaf corresponds to a wrapper layer. Wait too long and the wrappers can split, which shortens storage life.
Step-by-step: lifting garlic
- Loosen soil first with a fork inserted a few inches away from the stem.
- Lift the whole plant by the base once the bulb is free. Do not pull hard on the stalk.
- Handle like eggs. No tossing into buckets. Garlic bruises are sneaky and show up later as soft cloves.
- Keep dirt on for now. Just knock off loose chunks.
Curing Garlic
Garlic curing dries the outer wrappers and, most importantly, dries the neck and internal moisture so cloves stay firm for months.
How to cure garlic
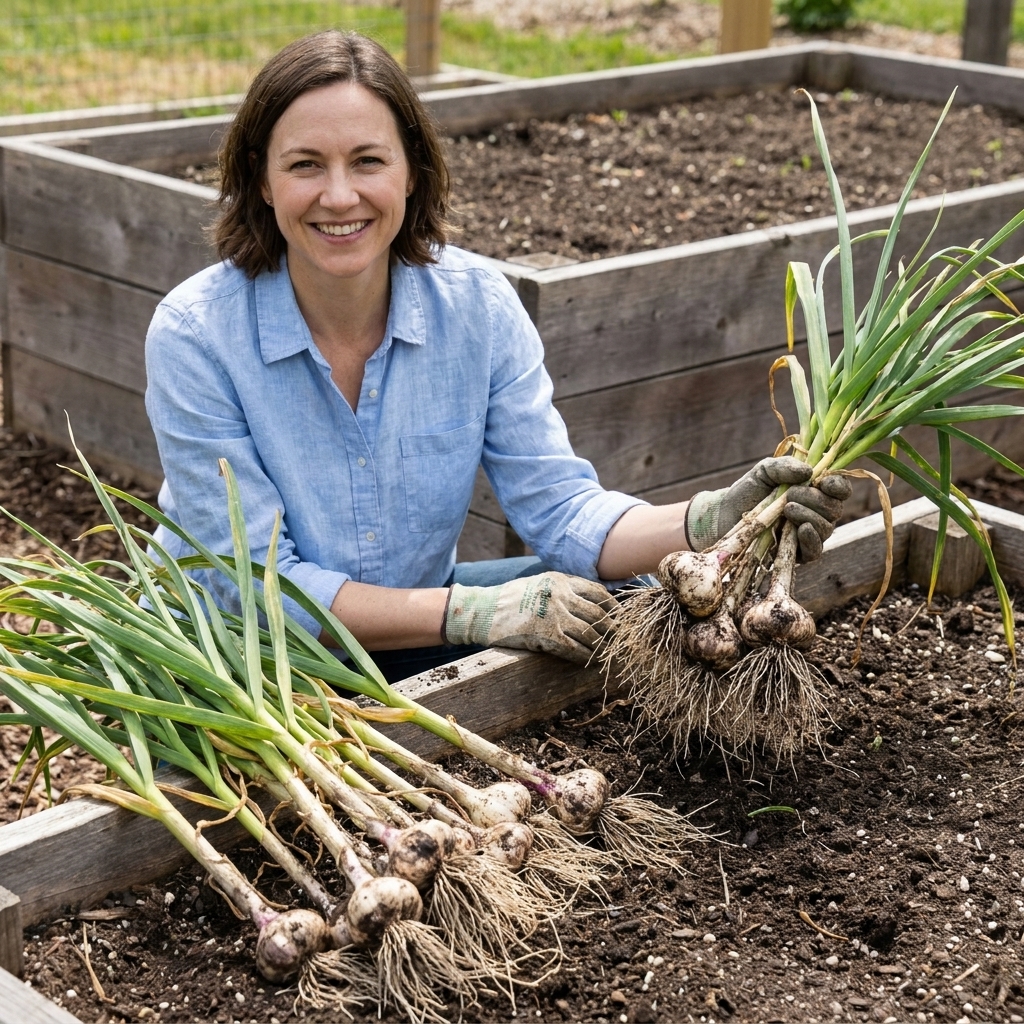
- Keep the plant intact: do not trim roots or tops before curing.
- Dry location: shaded, warm, and well-ventilated.
- Setup: hang in small bunches, lay on racks, or spread on screens in a single layer.
- Time: usually 3 to 4 weeks, sometimes longer in humid weather.
When it is cured
- Wrappers feel dry and papery.
- Stalks are dry down through the neck.
- Cloves feel firm when you squeeze the bulb gently.
Cleaning and trimming cured garlic
After curing:
- Brush off dried soil with your hands or a soft brush.
- Trim roots close.
- Trim the stalk to about 1 inch above the bulb for hardneck garlic, or keep longer if you like the look for storage bundles.
Storage note: softneck garlic usually stores longer than hardneck. Hardneck often goes 3 to 6 months, while softneck can last longer in good conditions. Either way, store garlic in a cool, dry place with airflow. Avoid sealed containers. I use open baskets or mesh bags in a pantry corner.
Raised Bed Tips
Soil texture affects everything
The fluffier your raised bed soil, the less damage you do at harvest. If your bed tends to compact:
- Add compost each season.
- Work in leaf mold or aged pine fines for better structure.
- Avoid walking or kneeling in the bed. Use a kneeling board that bridges edges if you need to reach.
Mark rows while tops are still green
When foliage collapses, it is easy to lose track of where garlic or potato rows actually are. I pop in small stakes while things are still upright so I can dig wider and safer.
Watch moisture in small beds
Raised beds dry out faster, then can swing wet quickly with rain. If you are close to harvest and a big storm is coming, it is often better to dig a day early than to cure a muddy crop.
Common Mistakes
- Washing storage crops right away: wash only what you are eating soon.
- Curing in the sun: sun is great for you, not for onions and potatoes. It can scald skins and green potatoes.
- Storing damaged produce: small wounds turn into big problems in a bin.
- Piling too deep: deep stacks trap moisture and heat. Keep layers shallow and ventilated.
- Skipping the sort check: during winter, check your stash every couple of weeks and remove anything soft or suspect.
- Storing diseased crops: do not store potatoes with late blight symptoms or bulbs with obvious rot. Keep questionable ones out of the pantry. When in doubt, trash them instead of composting.
Cheat Sheet
| Crop | Harvest timing cue | Do you wash? | Cure conditions | Cure time |
|---|---|---|---|---|
| Potatoes (storage) | Vines die back (or are cut), wait about 10 to 14 days if weather allows | No | 50 to 60°F, dark, humid, ventilated | 10 to 14 days |
| Onions | 50 to 75% tops flop naturally | No | Warm, airy, shaded | 2 to 3 weeks |
| Garlic | Lower 3 to 5 leaves brown, top leaves green | No | Warm, airy, shaded, plant intact | 3 to 4 weeks |
FAQ
Can I cure onions or garlic inside my house?
You can, as long as it is dry and you have airflow. A spare room with a fan and a drying rack works better than a closed, still closet. Keep them out of direct sun and away from high humidity areas.
What if it rains right after I harvest?
Get your crop under cover quickly and focus on airflow. Spread everything out in a single layer and use a fan if you can. Do not rush trimming. Let the outer layers dry before you handle them much.
Should I cure potatoes in the same area as onions and garlic?
I keep potatoes separate if possible, mainly because potatoes do best with higher humidity during curing, while onions and garlic want drier air. If you have to share space, prioritize airflow and keep them in different crates with room between.
How long will they store?
It varies by variety and conditions, but as a general expectation: cured onions can last several months, garlic often stores 4 to 8 months (softneck usually longer than hardneck), and properly cured potatoes can last well into winter. Checking your stash regularly and removing any soft pieces will dramatically extend the rest.